Wednesday, 19 October 2011

Furniture is coming in!!

MBR bed frame. It does occupy a huge chunk of my room...

hahaha...

anyway the mattress (placed in other room first) couldn't fit into HDB lift. The workers had to carry up and every floor have to pay $10.

3 of them carried... -_-"  really heavy.


Sofa.... another bulky item.

Delivered! yeah! looking forward to open up soon.


2x 2m long blinds installed. (Thanks to Sun Hup for helping to install.)

They are actually full black in color. The sun is too strong making it look purplish. haha. just nice fit our color scheme of purple, grey, white and black.

Monday, 17 October 2011

Guide to LED Cove Lighting

Today let me share on cove lights! How to do up LED lighting like what I had done for my own place.

I believe this article will be of interest to many people doing their renovations or changing to cheaper long lasting source of lighting.

I'm not an expert and during my schooling days, electrical and power modules are my weakest. Please take this article as only a simple guide. You should always consult your electrician. =)

Cove lighting is for ambience and it's installed at the extension part of your false ceiling or L-box. Normally contractors/electrician will quote you numerous T5 light tubes + numerous light installations + numerous lighting points. These depends on the length of the covelights that you want.

T5 tubes comes in different lengths, hence different power rating. Anyway, I normally see people using the 34" and 46" tubes. So if your covelight length is 6m, then you'll need about 6x 34" T5 tube or 5x 46" T5 tube.
<> 
Length (cm/inches)T5 tube
54.9cm / 22"24 watt
84.9cm / 34"39 watt
114.9cm / 46"54 watt
144.9cm / 60"80 watt

However if you want to use LED instead, you can simple replace all the T5 tubes with a LED strip. So maybe your electrician will charge you 1 installation point and 1 lighting point.


LED strips comes in different power intensity. There's 2 versions that was offered to me: 3528 and 5050. I can't remember the exact specs for the strips but simply put: 5050 is 2x the brightness of 3528. Each LED on the strip of 5050 is 2x stronger and brighter. Each reel can contain up to 10m long in LED.

Anyway, each strip only has 2 wires. +ve and -ve polarity. Similar to a battery. haha.

We just need to connect them to a transformer. This transformer will covert our AC current to DC current for the strips. I bought the industrial type of transformer. Big ones that will support my double layered lengthy covelight design. It's able to support comfortably, 3x 5m in length of 5050 LED strips. Your electrician just need to run from the light switch, 3 wires, 1 live, 1 neutral and 1 earth and connect to the transformer. (there's labelling on the transformer)


Viola. It's done. 1 transformer for my yellow LED strip and 1 transformer for my white LED strip.

I got 2 switches for individual on/off on the yellow lights and the white lights. Total used 9.5m of yellow and 9.5m of white for covelighting in my living and dining with 2 transformers (1 for yellow and 1 for white). Total cost less than $400 for these area. I bought lots more for the feature wall, and covelights in mbr as well. hahaha.


Here you can see the cove lighting.

2 LED strips just paste unto those normal white wire trunking and then placed inside the cove light area.

(LED strips comes with 3M tape behind. easy to install!)

Anyway hope this helps whoever that is interested in doing something similar. Here's what mine looks like. forgot to switch on yellow covelights before taking this photo... hahaha. But i think you guys should be able to get the idea!


Sunday, 16 October 2011


almost done when i took this picture!

BMS Marble & Granite came over on Saturday to do the kitchen-top installation!

It's a tough job. And really really dusty. Mr Chan and his workers are good! Highly recommended.

The granite slabs are just so super heavy.

(my washing machine still in the box. will be installed under the granite slab which is supported by that wooden pole temporarily)

Wednesday, 12 October 2011

A sneak preview of the mbr wardrobe, living and dining. =)

 Photo taken from the new main door.

Feature wall and the balcony chandelier.

Super long feature wall has it's ambience lighting up. TV installed by LG, sound system not yet installed.
Chandelier has both LED and normal bulbs on.

Didn't switch on the cove lights of the false ceiling and downlights. If not will be super bright.

Cove lights can be seen below. Showing the ultra bright white LED cove lights. Have also installed yellow covelights inside as well. So got white and yellow options for entire cove. Hence can switch to yellow for the "feel".  =P
Photo taken from dining room corner. Opposite to where 1st photo was.

Can see the partition wall and glass door that was the previous old main door. If got budget and $$, will do up a nice shoe rack for wife. Must learn from Charles & Keith type.... hahaha...

The feature wall bends over to the dining. the bottom still lack the LED lighting which electrician will do up this week.


Photo taken from MBR dresser. Showing the walkway and wardrobe. This area very hard to take any photos. I think the walkway only about 70cm wide.

Wardrobe have the tinted mirrors reflecting the partition wall in the mbr hiding the toilet.

My crystal lights for the entire dresser, walkway and also toilet! super chio. ladies see the dresser with the nice crystal lights effect. all who seen this area liked it.

Tuesday, 11 October 2011

Few days before handover

Aircon leakage has been rectified. Winter Cool Aircon said the problem is as what he says, it's due to the glue at the pipe not done well and it's common.

Well.... give and take. Guess we'll monitor the aircon this weekend also.


It's almost ending of the renovation. Now pending for SunHup to do the bracket for washing machine area and BMS marble/granite to do the kitchen top.

Minor touchups along the way.

Above my washing machine will be a nice big granite worktop. Waiting for this impatiently.....
The welded metal bracket will be secured to the 2 solid walls giving support to the weight of the granite top.

It's meant to be slightly smaller so that it can be easily seen from outside as this ara of the granite top is a polished single slab.


Here is the shop front of BMS marble granite.

Hope they do my granite top beautifully.

The boss is Mr Chan See Tang. The coordinator is Ms Mel. Friendly people. The place is really quite packed and granite/marble slabs are all around.

If you can see the wooden planks there, those are the "measurements" they take using planks of wood and stapled together.

Monday, 10 October 2011

Aircon Leakage

It's been about 2 weeks of finishing rectifications... Painting works, touchups, kitchen cabinet finishing, wardrobe finishing.


Just when all seem okie, the Winter Cool Aircon, Mr Chan, finally came to test the unit with me. (installed for sometime but he never come to test it out)

Everything was cool and nice. With cold air blowing strongly remotes, warranty cards given as well.

We tested it out for maybe an hour in the afternoon then he left and everything was switched off. In the evening when we went back to the place, we discovered fluid leaking from the 24K BTU aircon unit in the dining room. Leaking quite badly... The paint on the wall start to absorb the fluid as well.

It seems to come from the back of the aircon unit. Super upset. Saw so several aircon installations before. 1st time engaged Winter Cool as Sun Hup recommended them. 1st time I see leakage problems.

Not good.


How do you all test your aircon unit? Just blast it overnight and see what happens?

Thursday, 29 September 2011

Speed Work 2

Speedy Work gives excitment in seeing the house take shape

Thurs afternoon.
Kok called to say that the electrician found lots of broken lamps and shattered glass. Gosh.... was so upset that I had almost wanted to take leave. But I had calmed myself down saying we'll see what happened when we meet in the evening. We had checked all lights and I even played with the lights by wiring them up to see the effect in my room... and they were definitely in good condition when we had placed them in the house about 1 month ago... Maybe we had placed them there too early? Maybe the workers damaged them? Or did the glass shatter by themselves? Doubts and questions just keep popping up.

Thurs evening
The planned meeting of Sun Hup and their "heads" of plumbing and electrician. Met them and surprisingly, it's a short session. Had thought will be long and dreadful. But it's manageable.

The moment I stepped into the place, the plumber & electrician immediately catches me and ask me to confirm the locations and installations... luckily I had been prepared well.  =)

Had earlier prepared plans of where the toilet accessories and lights position.

1/2 of the lights are already up in place.

The cove lights and downlights are on but the switches still not yet connected.

The feature wall is up, only the drawers not completed. I can see the speakers connections and also the open net trunking prepared as well.

The broken lights...

Didn't take pictures of those lights that had been damaged. Those are the 2 common bedroom lights. Identical 4 glass holders on each lamp. Hence 2 lamps which are damaged. Had been surprised to see them shattered and also the plastic plugs for the lamp holders shattered as well. How can they be shattered when it was looking so nice earlier on??

I didn't want to point fingers... One of the electrician asked me if the lights were okie when I placed them there... I said yes... Then his partner came beside us and said, "Yah. last time I open before 1 box, the lamp was alright and not broken..."

Decided to move forward and not waste any more time and money. Luckily we had another ceiling lamp which was an extra... didn't place it anywhere and hence it'll go into 1 of the common room. Then I told the electricians to combine all remaining parts of the 2 broken lamps into 1 lamp. Should have enough good parts from what I see. Then it'll fulfil the remaining room. It's just too bad the common rooms are not having the same lights. Electrician then reply," okie. we'll try and see how to combine them." End of broken lights story... better not to dwell too much. Already stressful enough.

After telling the plumber the positions of the accessories, then Kok started to make suggestions on how to improve things... eg. Kitchen sliding door, he will remove his earlier work and also do a boxup with laminate for the sliding mechanism. He's really experienced but still, he's super busy..... to be able to grab more of his time is good.

Enough of words.... let's see some pics!

Wardrobe Carpentry in MBR

Living Room War Zone (Perlyn in Blue)

Agile in the Kitchen. Good Quality Wood... =P

Speedy Work

Astonishing speed of renovation.

Suddenly we can see things are coming into place and also Sun Hup putting more effort into the schedule chasing.

Just a couple of days.... Saturday was 1st day of painting. Sunday no work. Monday still painting. Tuesday still painting only half done. 

Suddenly by Wednesday evening...
  • Painting completed.
  • Flooring washing almost done.
  • TV feature wall halfway up.
  • Aircon installation completed.
  • Glass doors installed.

Didn't take much photos as there are too many workers in the place.

Installation of the feature wall must be complicated since there's so many of the workers working on the feature wall. Wondered if it's due to the length..... with all the wires inside as well... 


Monday, 26 September 2011

It's been some time since I blogged on the progress of the reno. Let me update on the series of unfortunate events.

It's painfully slow due to the rectifications.
  • The slanted false ceilings are corrected. Now they really look much better. The entrance of the kitchen wall was also straightened.


  • The kitchen cabinet and designs are settled. We have to fork out much more $$. At $95 per foot run, it really burst out budget with extra of 17 feet.


  • Purple ABS trimmings doesn't match the purple laminate we chosed. No choice but to choose black ABS trimmings.
Super worried if it'll be nice.


Painting have also started. Base coat of paint was applied to 2 rooms already.

Perlyn says by this Thurs painting will be completed. The aircon installation will then take place on Thurs.

Will be meeting the plumber, electrical and Sun Hup all together on Thurs night to finalize on the locations of all accessories.

It will be a long long night.

This 2 weeks will be the renovation hectic lifestyle as next Saturday will be the delivery by Courts for all my electrical appliances.


Monday, 12 September 2011

A Series of Unfortunate Events

Guess what, maybe like all others have said, we cannot be too relaxed with contractors/ID.  Our renovations surfaced some issues and Kok are suggesting to us how to resolve them.

A Series of Unfortunate Events.

Kitchen

1.) After we chosed the settled the purple laminates, Perlyn called 2 weeks later to say no more stocks. Need to wait till end of Oct. Sun Hup say they were played out by the vendor for stock availability. Really bad move as the purple is the highlight and we had really specified for it. In addition, Perlyn had checked and told us there are stocks when we confirmed it.

Solution: Kok will pay for air freight for the laminates to come in after upsetting us. Not the best way to do business but still it's a solution. Thumbsup for being responsible.

2.) With the laminates incident still super fresh (less than 2 days) we were given a new kitchen 3D drawing.

The original 3D drawing dimensions are grossly wrong. No one really knows what went wrong. Kok tells me the designer started the sink area before the box up pipe. Hence there's a difference of 40cm. But still, suddenly it's 1.5 door widths that's missing. => means missing length of 80 to 90cm. So a length of 5m, can have 80cm missing....

How did Sun Hup draw such nice 3D but the length of my kitchen wasn't so long? No one realized it during these 2 months. Now before carpentry is going to be up with the cabinet base done, the placement all went wrong. And suddenly a new 3D is thrusted into our faces telling us this will be the actual.

The cooker-hob will now be 20cm beside the oven. 40cm to the sink. 30cm to the overhanging dish rack.

How can accept right?

Solution: Now Kok suggests that we shift the tall cabinets and fridge to the left wall. This will then solve the issue of fire-hob too close to the wooden cabinets and the water-sink. This means we might incur more costs for more cabinets. And might delay the reno since we have to redo the kitchen base. Kok has at least been pro-active and understands our concerns.

MBR Toilet


We just realized that the MBR toilet tiles didn't match the grout lines at all. We can't accept this.

If they had started all from the same side, then due to small differences in tile sizes and shifted the lines, then we got nothing to say. But now.... Floor tiling starts from the left and Wall tiling starts from the right. Nowhere in the entire toilet can we see a single matching in the grout lines.

Solution: Kok says he'll get his tiler to overlay and try to match the grout lines. No choice unless we would consider hacking again. Not perfect but I guess we have to accept this. Be positive means double protection of waterproofing?


False Ceiling


The false ceilings are completed. However, the leveling is a problem. Sun Hup has done in with laser levelling device showing a perfect horizontal levelling to the FLOOR. It's so called, "water levelled".

BUT, my ceiling and beams are all slanted. With a levelled false ceiling.... now everything looks out of place. The kitchen they say no choice due to tiling will show significant slantness. Now, even living and dining?

Solution:

For dining room view, Kok says that he'll box up the beam to make it look straight so that both the kitchen tile area and the false ceiling looks aligned.


For Living room, the false ceiling will be redone up to follow the beam/ceiling.


A series of unfortunate events... Hopefully it'll have a good ending.

Tuesday, 6 September 2011

King Size Bed from Cellini and L-shaped Sofa from Nova furniture


We finalized our bed from Cellini!

It's going to be king sized and the mattress is Cellini's nightingale spinal supreme (the one with latex top. No idea if it's plush top or pillow top or whatever top... hahahaha). It's quite big...pray hard that MBR is not overly squeezed...


Decided to buy the L-shaped fabric sofa from Nova furniture.
Fabric not yet chosen. We were convinced by their Sales Manager Edi (tradehub 21) to buy it. Had a hard time deciding leather or fabric.

Hopefully things are as good as Edi says.

We also placed a deposit for a dining table. Had some reservations regarding it.

Suddenly feels quite poor.... sighz...

Friday, 2 September 2011

Our Electrical Appliances!

Time to update the electrical appliances! We have bought quite several items from Courts! Now pending delivery! Courts is a place that I had never thought of going there to purchase but sometimes their discounts can be quite deep. Especially if you get those 1st 5 sets limited deals...


Our fridge is the Samsung side by side model RS21-HNEPN.

Made in Korea. Hopefully will last.

The exterior is a nice brushed gun-metal grey color.

The interior is decent at 551litres.

Although the freezer compartment does seem a tad too big. Maybe suitable for me to have tubs tubs tubs of ice cream.


Our TVs!  We bought the Plasma to be placed in the living room for the "wow" colors and "wow" size. =) HD-Ready. Nothing special but just a nice 50" tv.

Model: LG PT250


For our MBR, we bought a 42" Smart LED TV.

LG 42LV5500

No 3D since it's so clumbersome for people who wear specs.

Hopefully with the smart function, we can surf net. Should hook this up to computer as well.

Tuesday, 30 August 2011

Wardrobe Internal Planning

Cool drawing? hahaha. Perlyn drew for us whilst we are selecting from the options of layout. She drew it upside down! Power... (means it's upright drawing for us to see when she's sitting opposite)

I'm so happy, wife "allocates" half of wardrobe to me!

However, we are thinking of adding a few more drawers. Seems not enough. Total length of wardrobe is abt 3.8m?? Not enough still....  =(

Monday, 29 August 2011

Reno Updates and iHandy Level Application

Challenges.....
Sun Hup had mentioned to me that my ceiling, beams and flooring are all not level. Worse still, they are not consistently level. I had not really believe them that it can be so bad...( they said there can be a difference of 2 inches of beam height across a distance of 80cm!! :dribble: )

Things just look slanted from their work. BUT... I downloaded a super useful app on my iPhone. it's called iHandy Level. It can be used to measure how level the surface.

Measured on the work of Sun Hup using the app. Their work are all level and straight. Very very good. But this also means HDB's existing structure leaves much to be desired... old flats. haiiz. simply heart pain.

This mean that there are corners where it'll not be perfect 90° angled. Hopefully their workers are skilled enough to set things right.


The earlier problems of the water piping are all fixed.

Guess once ah Kok sees the issue that we brings up, he's very willing to listen understand and amend.

Kudos!


Wednesday, 24 August 2011

FYI for Aircon Copper Pipe Gauge sizes. G22 G23 etc

Here's a diagram explaining the aircon copper pipe gauge sizes.  =)

Took me some time to google this. Hope it'll help people doing new aircon.

Monday, 22 August 2011

Updates to Renovation by Sun Hup


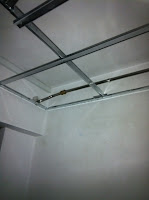
False Ceiling is in progress!
This view is from the MBR. Can you spot the box up of aircon piping?

Also the cove light area is up!

Suddenly noticed a water pip that juts out from nowhere....

Going to highlight this to Sun Hup. It seems lower than the false ceiling. No way will I accept an exposed pipe lower than my false ceiling.
New Rubbish Chute installed.

The water outlet pipe seems too high. My washing machine is supposed to be hidden under the solid top.

Looks like another water piping to reflect to Sun Hup.


False Ceiling View of the Dining room.

Look at the corner where the water pipe runs into the MBR. This explains why it juts out....

Having problems are part and parcel of renovations. Quality of work will see how well are the rectifications as well. Let's see what are the comments by Sun Hup!


Sunday, 21 August 2011

Toilet Bowl

Bought our toilet bowl today! $218 each with the bottom adapter.

It's actually the same model as my current home. Guess I'm used to sitting on it. hahaha.

It's those 1 solid piece type. Looks nicer than those with tanks that are separated.

Saturday, 20 August 2011

Onimi RainShower and Storage Heater!!

We bought our Rainshower set!!

It's a squarish design. Onimi brand which I never heard before anyway. hahaha. But the design and price won me over.
The mixer is really heavy!

The rainshower head is on the right. Not overly big but we think it'll suffice.

Oh. Can also see our Champs storage heater tank. 15 litres just for the MBR. hahahaha. So looking forward.

It's also very good deal.

Thursday, 18 August 2011

Updates! Toilet Windows, Air Con Trunking & Kitchen.

The toilets tiling and windows are done!!

Somehow the common toilet tiles being less reflective are not as nice.


 The aircon guy also came!

2 trips installation I guess. Only pipings are done up.

1/2" Aramflex Class 1 insulation and G22 Copper pipes for my
Mitsubishi Starmax System 3. 1x 24k BTU unit for living room and 2x 9k BTU for MBR and common room.

The boarded up area in MBR. The piping is quite neatly placed.
Kitchen wall tiles are also done!
See the small half wall there? It's meant to be the backing to the Washing Machine!

The concrete sink support will be built up later I suppose.